If your concrete foundation wall has cracks, you are certainly not alone. Most homes will eventually develop foundation cracks, and if yours aren’t leaking right now, it is only a matter of time that they will. This is because your house’s exterior waterproofing deteriorates over time, gradually taking its toll on the foundations.
We have interviewed Jim Lucas – a foundation expert from Crackmasters Inc. about things Canadians can do by themselves to protect their home from water damage.
Why worry if you have a crack in your foundation wall?
A crack, even if it hasn’t created any structural troubles at the moment, is always a suspicious thing that is not so easy to fix, despite what many people think. Even the ones that are no more than a hairline can grow in width and/or length and create several issues. In general, any cracks wider than 1/6 of an inch are perfect candidates for problems, especially if they increase in size, admit water or face grind against each other with humidity and temperature changes, because that means that you have foundation movement, which is never a good thing. Cracks 1/6 inch wide also allow pests (i.e. termites) to slip through them and cause additional problems that may require a pest exterminator to solve.
The good news is that, in most cases, you only have to worry about the large cracks as they are the ones that probably indicate structural issues.
When to call a professional foundation repair expert:
- A crack wraps around a corner.
- A crack runs horizontally, and you notice that the wall below it is leaning into your basement.
- A crack reaches from the top of the foundation wall to the basement wall.
- The doors in your home don’t close in the frame (don’t fit the jams as well as they did before).
- One side of a wall is higher than the other.
All these are indicative signs that the soil that supports your foundation is moving. With it, moves your foundation, too, either vertically or horizontally (structural movement).

With cracks on your foundation/basement walls, you are actually inviting water (and not only) to come in. Although you may have wished for an indoor pool, the one you will get from water flooding your basement is nothing but a huge trouble. Think of it like a termite eating your favorite wooden chair from the inside. At some point, you will attempt to sit on it and just fall because the structure of the chair is being damaged and can’t support your weight (or even itself).
The wrong ways to waterproof or fix a wet basement

So, what can you do to repair a crack in a basement wall to avoid water damage and mold growth in your foundation walls? Some homeowners try patching compounds and materials such as hydraulic cement and caulk. Unfortunately, they have learned the hard way that these solutions are just temporary band-aids. Hydraulic cement and patching compounds are rigid materials and don’t bond well to concrete and quickly separate from it due to the natural movement of the concrete. Caulk, on the other hand, loses its bond and adhesion with the concrete after a short period of time. So, you are bound to fail, if you are using such types of waterproofing methods.
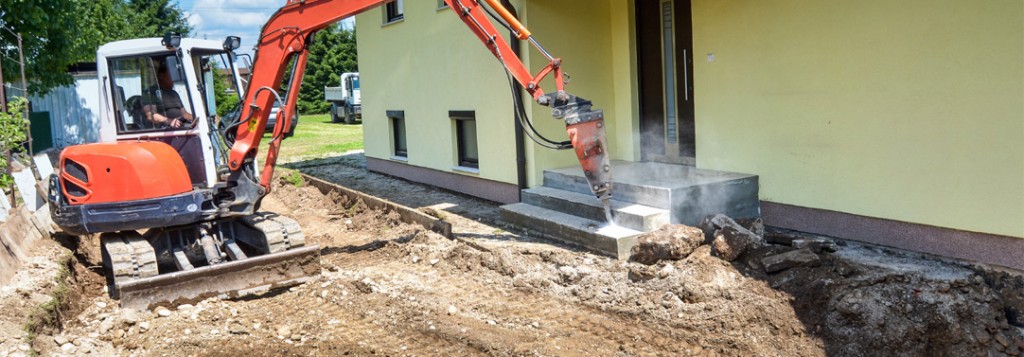
Others prefer to take jackhammers and break up the basement floor, have wired and plumbed sump pumps, dig out dirt from the foundation walls with backhoes, and other such drastic measures that come with a high cost and doubtful results. The trick with these solutions is that they may make sense but are actually trying to seal a foundation as tightly as possible so that it holds off water, much like a boat does. However, this is impossible to achieve, unless you live in a houseboat. Your house won’t flow, so such solutions won’t give you fruits (at least, not the kinds of fruit you want to taste).
Who is to blame for basement leaks?
 Most cracks and leaks in basements are related with the drainage conditions around the exterior of the house. If, for example, the soil around the foundation is allowed to collect too much water, then it will leak into the basement through the walls. It is also possible that it will even up through the center of the floor.
Don’t blame your house’s natural level of water in the soil (water table). Homes are always built above water tables. Otherwise, your house would have its foundation in mud. So, there is no such thing as a high or rising water table that causes your foundations to leak. If your basement floods after, say, a storm, heavy snowmelt or rainfall, it is your drainage system that needs fixing.
How to improve your drainage condition?

In brief:
- Before the snow melts shovel it away from the foundation of the house
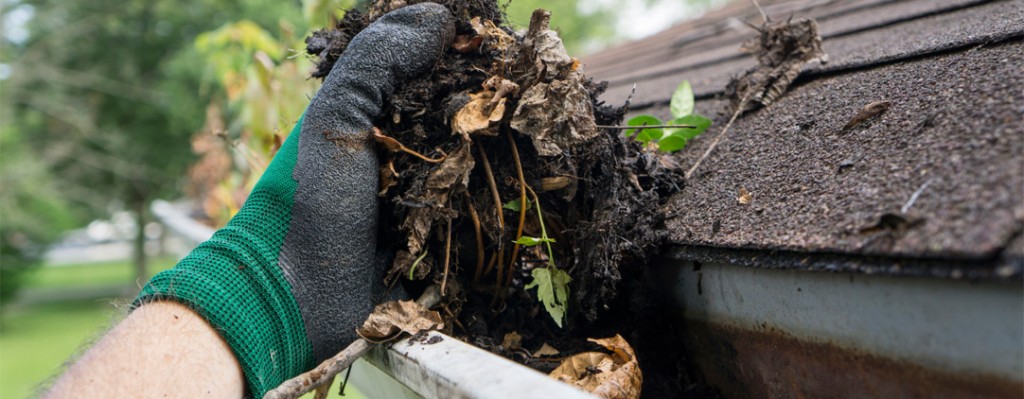
- Keep your gutters clean.
- Alter the grade of the soil around the house.
- Keep shade trees with aggressive roots in check.
In detail:
To improve your drainage conditions you can follow these easy, cheap, and highly effective waterproofing solutions.
1. Well-maintained and Good Quality Gutters
 The number one cause of basement leakage is roof damage. Just think about it. The roof is just as large as your house, so it collects a LOT of water, especially in heavy rainstorms. In most cases, what happens to all that water makes the difference between a dry and soaked wet basement.
When your gutters are clogged, they overflow and water pools around your foundation. For that reason, it is always advised to remove any debris and leaves twice a year, usually after spring and fall when leaves and buds have fallen off the trees.
After a good clean up, installing leave guards and downspout extenders to direct water, at least, 4-6 feet from the foundation is also an effective measure. Otherwise, it will be like having big fire hoses blasting water right into your basement.
That aside, properly designed gutters are those with a downspout every 600-800 sq.ft of roof surface (at least). Also, it is a good idea to discharge downspouts into solid underground PVC plumbing pipes that release water to a low-lying area or the street. But, for this, you will need to check the local buildings laws and see if they allow such improvement. If they do, make sure you avoid backups by pitching the pipe just a little bit toward the discharge point and refrain yourself from using the flexible black pipes landscapers usually use because they are soft and cannot be sneaked clean. Plus, they crack way too easily.
2. Change the angle of the soil around the perimeter of the foundation

The soil should slope downward to keep rainfall from gathering around the foundation and rushing through your home’s foundation through cracks. Ideally, the slope should be 6 inches over the first 4ft from the foundation wall and then be gradually graded even more so that water can’t run back toward the house. Or you could pitch the surrounding soil away from the house at an, at least, ¼ inch/foot slope.
This could mean you will need to add clean soil (fill dirt, not topsoil because it is more organic that needed and will hold water against your foundation, which is something we definitely NOT want) and raking it smooth until you get the desired result. If the grade is highest at the perimeter of the house, then you did a great job. Finish with a layer of grass and topsoil or mulch and stones. This will prevent erosion. No matter which top layer you choose to use, though, ensure you establish the slope with the fill dirt; otherwise, the water will run into your basement through the more porous material.
Finally, avoid timber, stone or brick landscape edging around your flower beds adjacent to the foundation walls or any other treatment that holds soil close to the house. Although they are very appealing, they increase your risk of having your basement flooded after heavy rainfall because they prevent water from draining away from the foundation.
3. Plant trees wisely

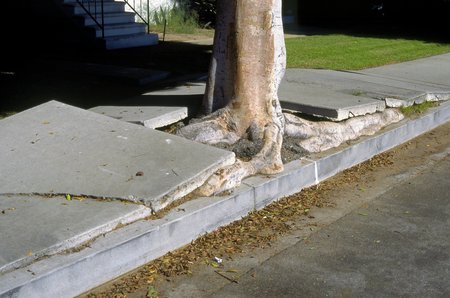
Shade trees may be beautiful additions to your house’s exterior for many reasons. However, those with aggressive roots, like silver maples, are best to be planted at least 20feet from the home so that their roots don’t damage or cause cracks in the foundation. As for smaller species, you can plant them at around 10-15 feet away and be safe.
That aside, cleaning the snow around the house in winter is also important because it will eventually melt and go down your foundation and into any cracks you may have there, causing extra damage.
Fixing a crack in foundation walls is a tough task and simply filling one with epoxy and then crossing your fingers hoping that it holds won’t do. If you notice large cracks that are getting larger, it is paramount to evaluate the foundation inside and out and identify the cause of those cracks so you can undertake the necessary repairs. Of course, for smaller cracks, you can do your homework and attempt a DIY repair. There are several sites that offer small-scale versions of epoxy injection kits that contractors use, as well as cement-based products that will provide you with solid, yet temporary, solutions.
What you really need is to have those cracks shut for good. And, for that reason, you need an experienced foundation repair company to solve your issues and save your home from further damage and problems that come from cracks in foundation once and for all.
